We’ve got our hands on one of NVIDIA’s amazing ‘Jetson Nano’ processors and developer kit. The Jetson Nano is described by NVIDIA as being used by professional developers to ‘create breakthrough AI products across all industries, and by students and enthusiasts for hands-on AI learning and making amazing projects’ (https://developer.nvidia.com/embedded-computing).
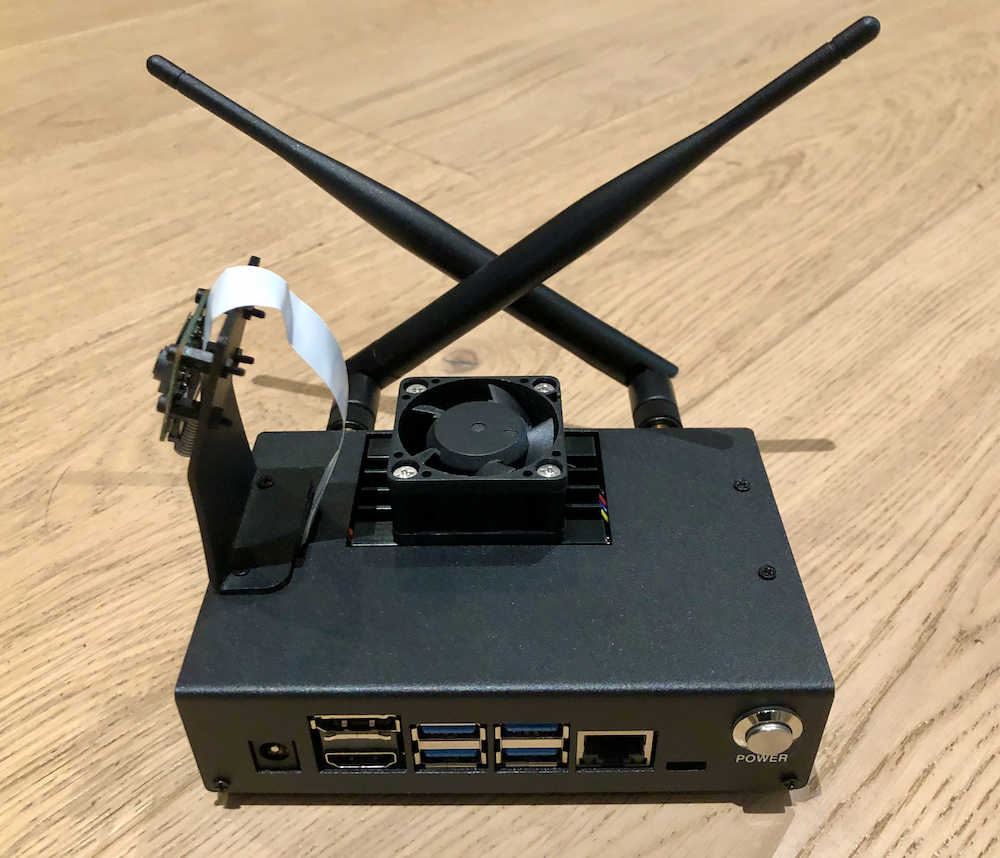
This small unit packs a big punch and is designed especially for AI projects. Running an ARM Cortex-A57MPCore(Quad-Core) processor, with 4GB LPDDR4 and 16GB eMMC, running Ubuntu Linux. However, the key feature is the unit contains an NVIDIA 128-core MAXWELL GPU capable of ES Shader Performance of up to 512 GFLOPS (FP16) with a maximum operating frequency of 921MHz. Wow, the capacity for making 512 billion floating-point operations per second (over half a teraflop!) is very impressive! So quite a machine, and it is relatively inexpensive – so an excellent means to learn about and dabble in many aspects of AI. The image below shows the Nano with additional WiFi hardware, a cooling fan and a Raspberry Pi camera – as well as a smart metal case.


To set up the Jetson Nano, which is running Ubuntu Linux, the first thing is to download the latest image from the NVIDIA downloads centre (https://developer.nvidia.com/embedded/downloads). The file for the nano is called ‘sd-blob-b01.img’ and is 13.7Gb in size – a long download! The file is copied onto the MicroSD card that the Jetson Nano has. This is all much as with a Raspberry Pi – the laptop runs a programme, e.g. ‘Etcher‘ that does this copy. We followed the instructions at https://developer.nvidia.com/embedded/learn/get-started-jetson-nano-devkit#write and copied the img file to the MicroSD card. After copying the file, the image is validated on the card.


After inserting the newly created MicroSD card in the Nano, we followed the instructions at https://developer.nvidia.com/embedded/learn/get-started-jetson-nano-devkit#setup to set the Nano up in ‘Headless’ mode (e.g. with no monitor and keyboard attached). To do this one can connect a laptop ‘usb’ port to the micro-usb port on the Nano and open a Serial terminal. For the MacBook Pro laptop used this meant using a ‘USB-C to MicroUSB’ cable. The tty device was identified, and then accessed. Finally, we had access to the Jetson initial configuration startup script. Other useful blogs we looked at were here https://jkjung-avt.github.io/setting-up-nano and https://jkjung-avt.github.io/opencv-on-nano.


We hit a problem then, as one of the screens launches a configuration of the network interface for the Nano. Absolutely nothing that we did could cajole the Nano to connect to the WiFi network. Eventually this was solved by plugging in directly a network cable to the RJ45 socket, and selecting the ‘eth0‘ network interface (and not using WiFi). This was successful, and with the USB terminal cable still open, the IP address assigned to eth0 was established


Finally, after selecting a user name and password, and host Name, we were able to disconnect the serial USB cable, and ‘ssh’ into the Nano remotely via the IP address established earlier. The first thing to do then is update the operating system. Following these instructions, we typed: sudo apt-get update and sudo apt-get upgrade.

This process takes a while, but finally, after rebooting with sudo reboot, we logged back in again and found the Jetson Nano ready to go!
free -m – check how much space the filesystems have
We wanted to be able to access the graphical user interface of the Nano, but remotely. To do this we used xrdb (graphical Remote Desktop), and following these instructions, typed:
sudo apt-get install ubuntu-desktop – the system already had the latest version
sudo apt-get install xrdp – to install xrdp
sudo systemctl enable xrdp – to make xrdp start on boot up
We then rebooted and the used the Microsoft ‘Remote Desktop‘ app on the MacBook to connect to the Nano using it’s IP address.

In a new terminal, we then readied our Python environment
sudo apt install python3-pip – noting pip3 was not installed by default
pip3 install wheel – to install wheel
sudo apt-get install synaptic – always useful to have this graphical package manager
If one wants also to be able to run Jupyter Notebook locally, here are the steps we took. However, note that the tutorials NVIDIA offer all also run from Docker Images to save time too.
sudo apt install libzmq3-dev – (libzmq-dev being no longer supported)
sudo apt-get install libffi-dev
sudo apt install nodejs npm – to install node
sudo npm cache clean -f
sudo npm install -g n
sudo n stable
node -v – to check we are using latest version of node
sudo pip3 install jupyter jupyterlab – to install Jupyter Notebook
sudo jupyter labextension install @jupyter-widgets/jupyterlab-manager
jupyter lab –generate-config
and finally ….
jupyter notebook

What to do next? We looked at some of the amazing community projects at https://developer.nvidia.com/embedded/community/jetson-projects for inspiration as to what the next steps can be…..
For an initial learning experience, we went over to the NVIDIA ‘Two Days to a Demo’ exercises at https://developer.nvidia.com/embedded/twodaystoademo#hello_ai_world. Here, one can either build the environments required from source line by line, or load and run docker images for each tutorial. For ease of use, the Docker approach is favoured for first time users! Further exploits are recorded in the following blog https://digitalenvironment.org/jetson-nano-object-detection-and-image-classification.
Jetson Nano – Object Detection and Image Classification – NERC Constructing a Digital Environment
December 23, 2021 at 2:36 pm[…] our previous blog (https://digitalenvironment.org/the-nvidia-jetson-nano-first-look-and-setup) we explored setting up and running the amazing Jetson Nano Developer Kit from NVIDIA. This little […]